Before you start hitting the slopes, you must first become acquainted with its primary piece of equipment – the Snowboard.
Table could not be displayed.Moreover, you must know what a Snowboard consists of, its different elements, and how it works before you should even try to ride one. In this section, you will learn that Snowboards nowadays are highly technical feats of engineering.
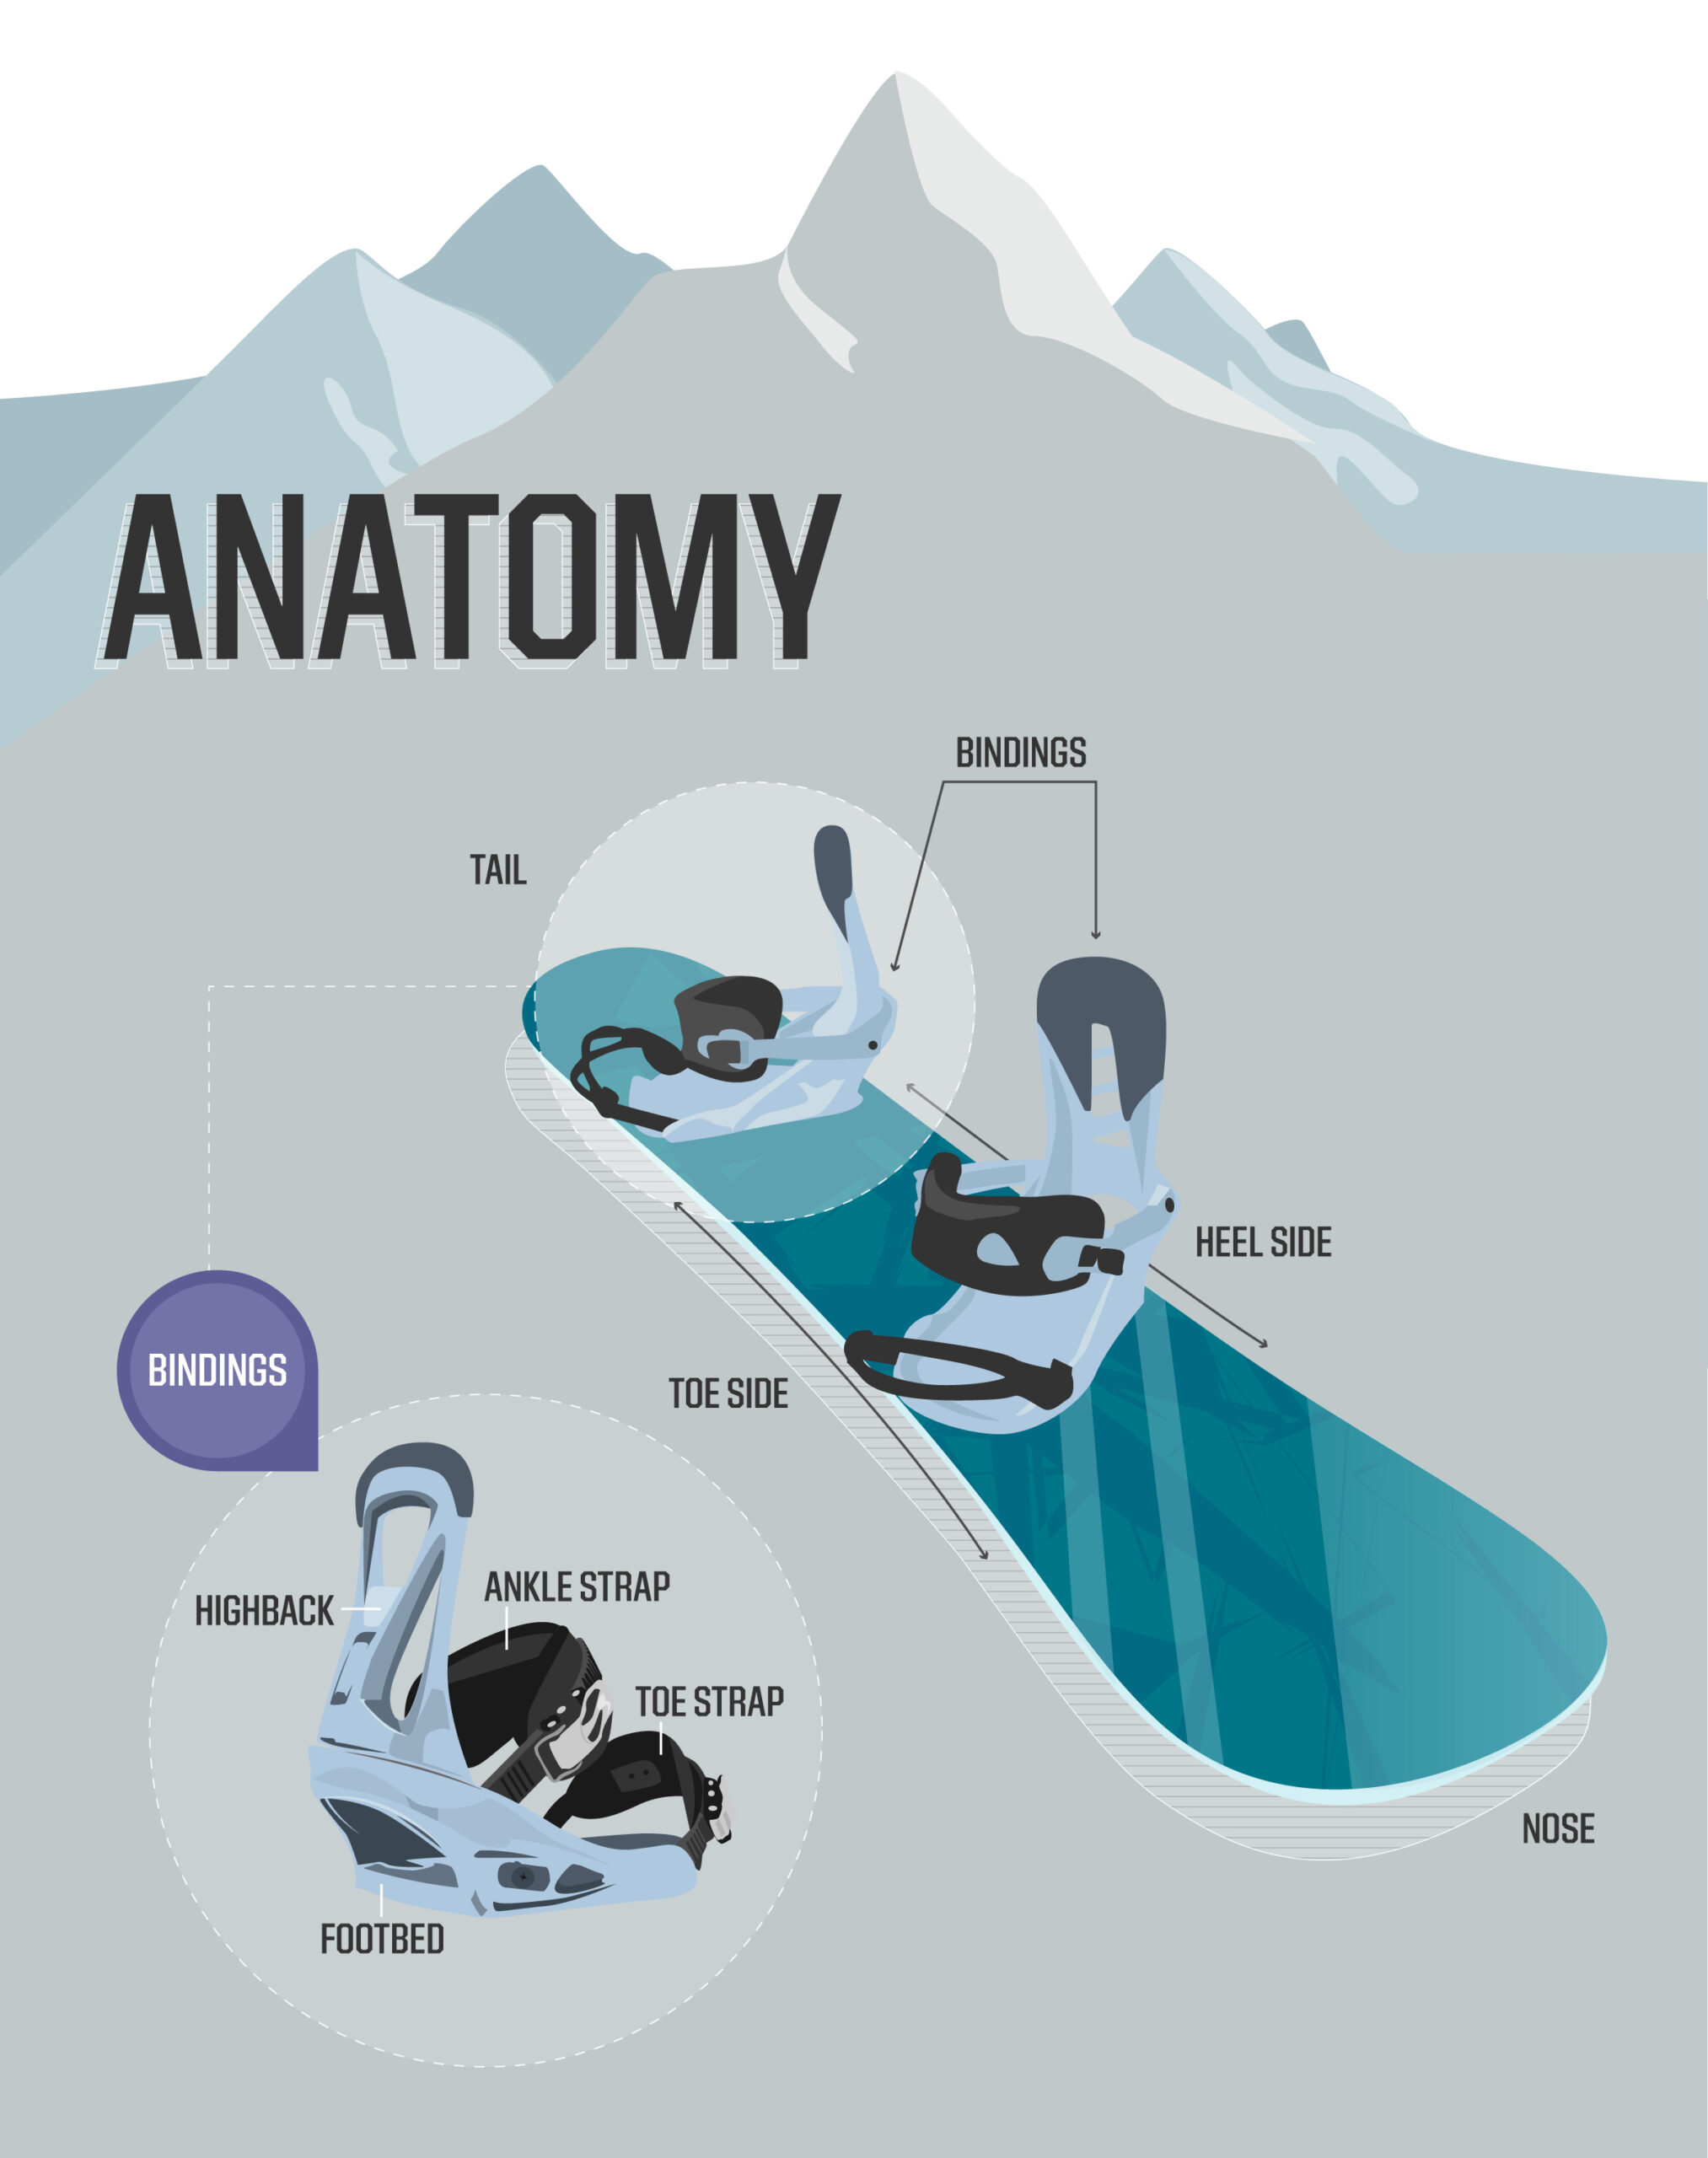
If you already have a Snowboard, take time to identify the following elements.
1. Base
This is the bottom side of the Snowboard, the part that touches the snow surface. Getting bases that glide faster is the perpetual quest of any serious tuner or racer.
Most Snowboard bases are made from a polyethylene material called P-Tex. These bases are either “sintered” or “extruded” type. Extruded bases are melted and cut to shape. They are long-lasting and easy to repair.
However, the extruded type of base is the slowest and holds less wax than the other types of bases. Sintered bases, on the other hand, are first grounded into powder, heated, pressed, and then sliced into shape.
A sintered base is superior to the extruded base – it’s more durable, faster, and holds wax better. Even so, it’s more expensive and difficult to repair.
If you’re looking for high performance, opt for a Snowboard with a sintered base. Then again, if you’re on a tight budget, an extruded model will do.
Another type of Snowboard base that is better than the sintered P-Tex base is a “graphite” base. Graphite base is the fastest type of Snowboard base and has a higher capacity to hold wax.
In a graphite base, graphite is added to the polyethylene pellets that are used to make the base. This type is always deep black and is mostly found on fast racing Snowboards.
2. Camber
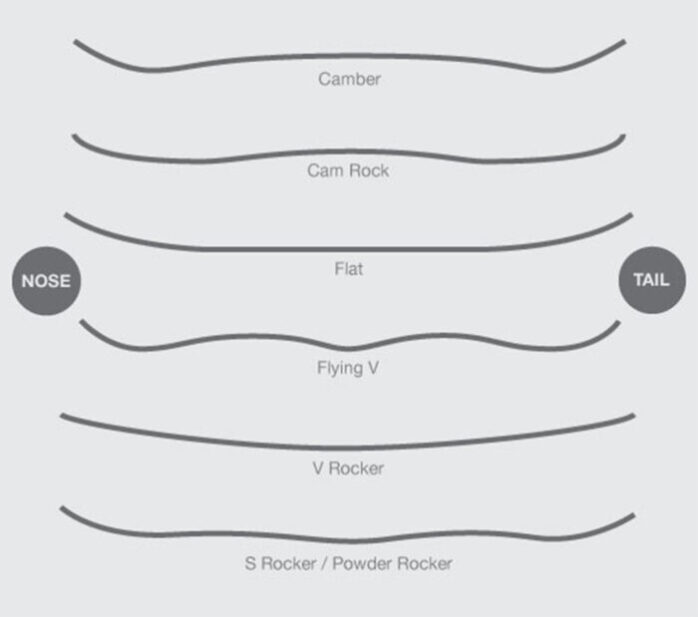
This is the gentle arch the board makes when you rest it on a flat surface. Camber is closely related to flex – the higher the camber, the more pressure the board puts at the nose and tail.
A Flat camber indicates that a board may spin easily, which can be good for certain freestyle moves. In a used board, however, it may also be a sign that the board is worn out. In most new boards, choose a slightly springy camber that helps stabilize the board at higher speeds and on hard snow, and makes it easier to turn.
3. Contact Points
These are the points at which the board makes contact with the snow without the pressure of the rider being displaced on the board. This is also called the board’s “wheel base”. Contact points can be found near the nose and the tail.
Place the board on a smooth, flat surface then slide a piece of paper under the center of the Snowboard. Slide the paper toward the nose or tail until it stops.
4. Edge
This is the metal edge on the Snowboard. The “toe edge” is the edge at the toe side of the Snowboard. Accordingly, the “heel edge” is the edge at the heel side of the Snowboard.
5. Effective Edge
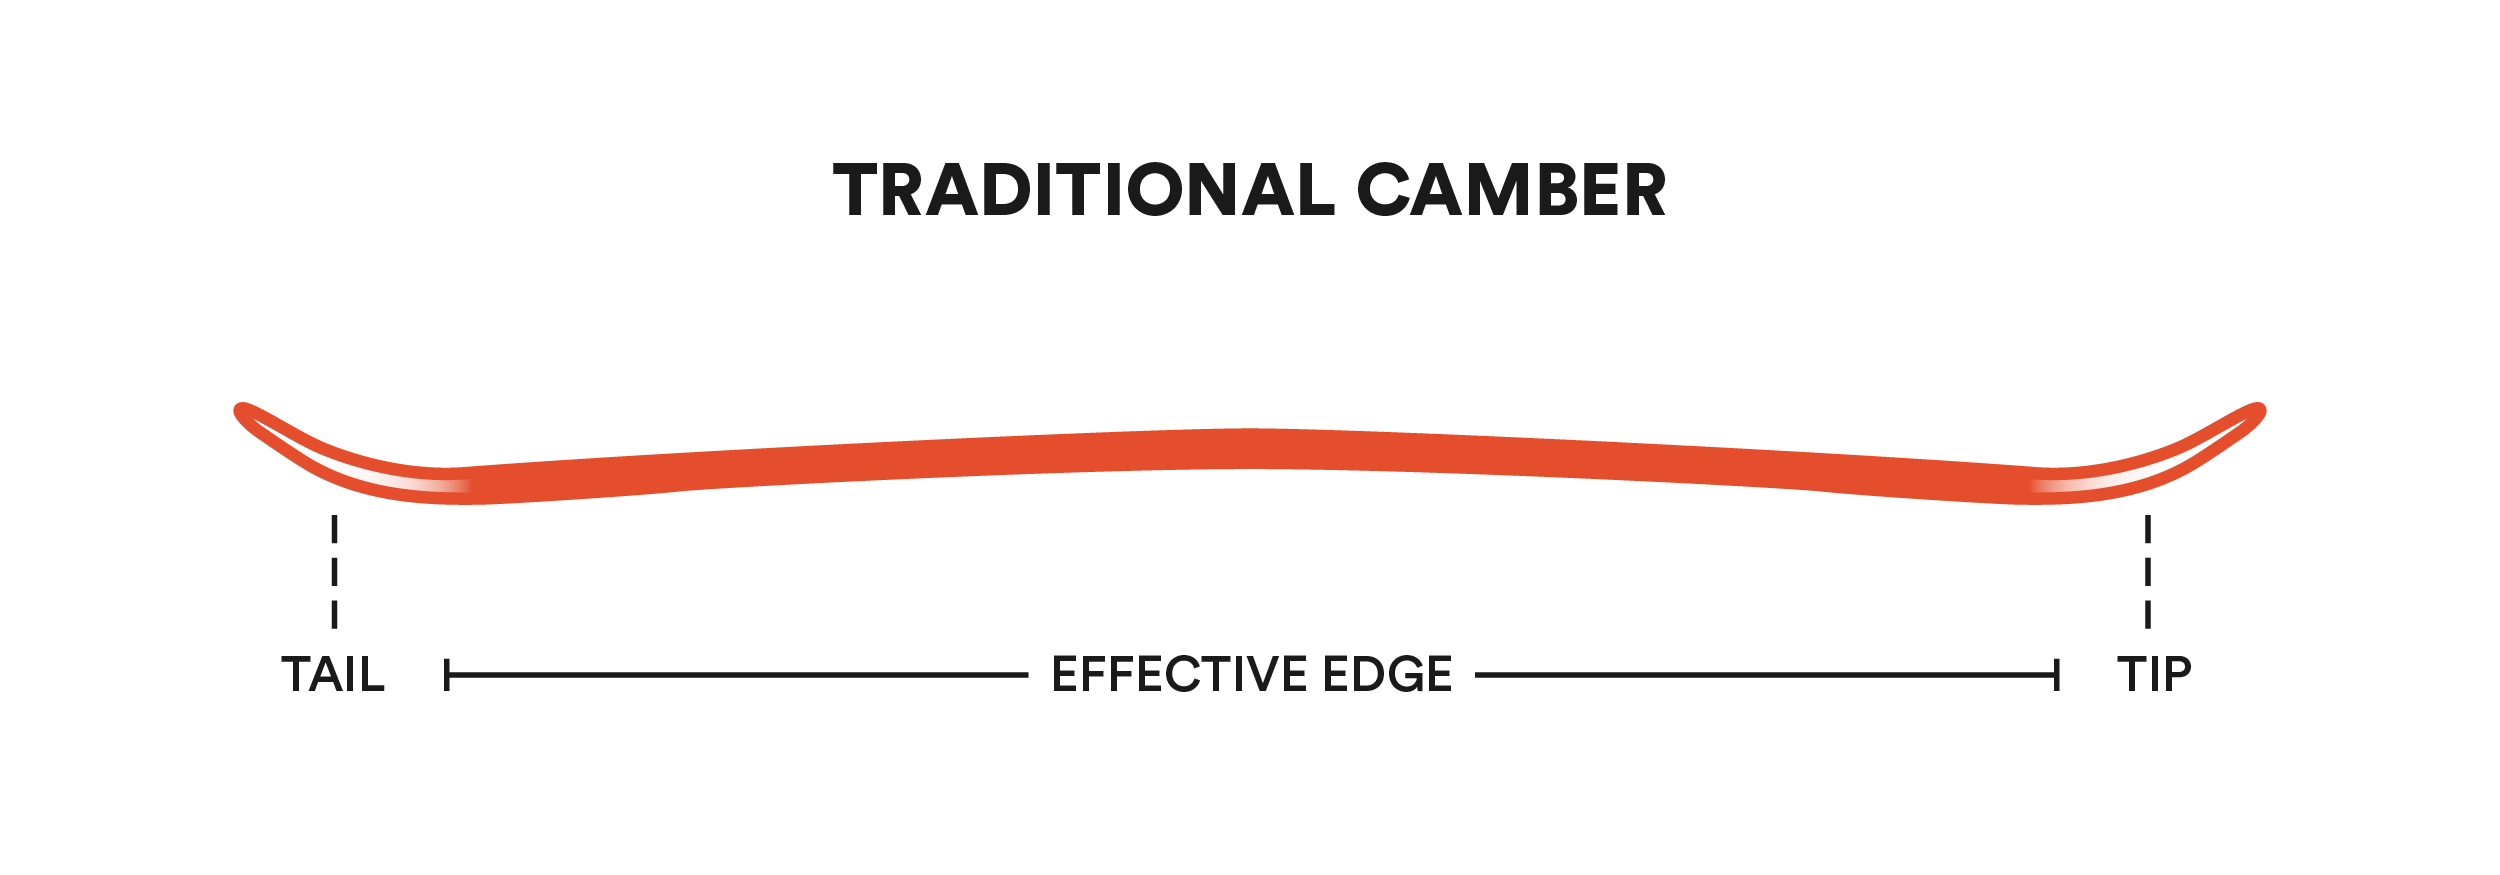
The length of metal edge on the Snowboard which touches the snow is the effective part that is used to make a turn.
Consequently, it does not include the edge of the tip and tail. The effective edge is in contact with the snow when the board is in a carved turn.
A longer effective edge makes for a more stable, controlled ride; a shorter effective edge makes for a looser, easier turning board.
6. Flex Point
The flex point is located between the two Snowboard Bindings. This is the point where the board begins or ends its flex and allows for sidecut radius contact.
“Stiff torsional flex” allows a board to grip hard snow and Ice. On the other hand, “soft torsional flex” makes a board less responsive, but more forgiving to the rider.
Lighter riders and beginners usually prefer Snowboards with softer flex since softer flex handles better in the bumps and are easier to turn.
Freestyle boards are the softest among the three types of boards. Next comes Freeride boards. Carving Snowboards are built with fairly firm flex and stiff torsion.
7. Nose/Tip
This is the front end of the Snowboard. If your Snowboard has a similar front and backside, the side that is turned up higher is usually the nose.
Alpine Snowboards often have a more pointed nose. You need a higher nose or tip for higher speed alpine riding to keep your snowboard from digging itself into the snow.
8. Sidecut Radius
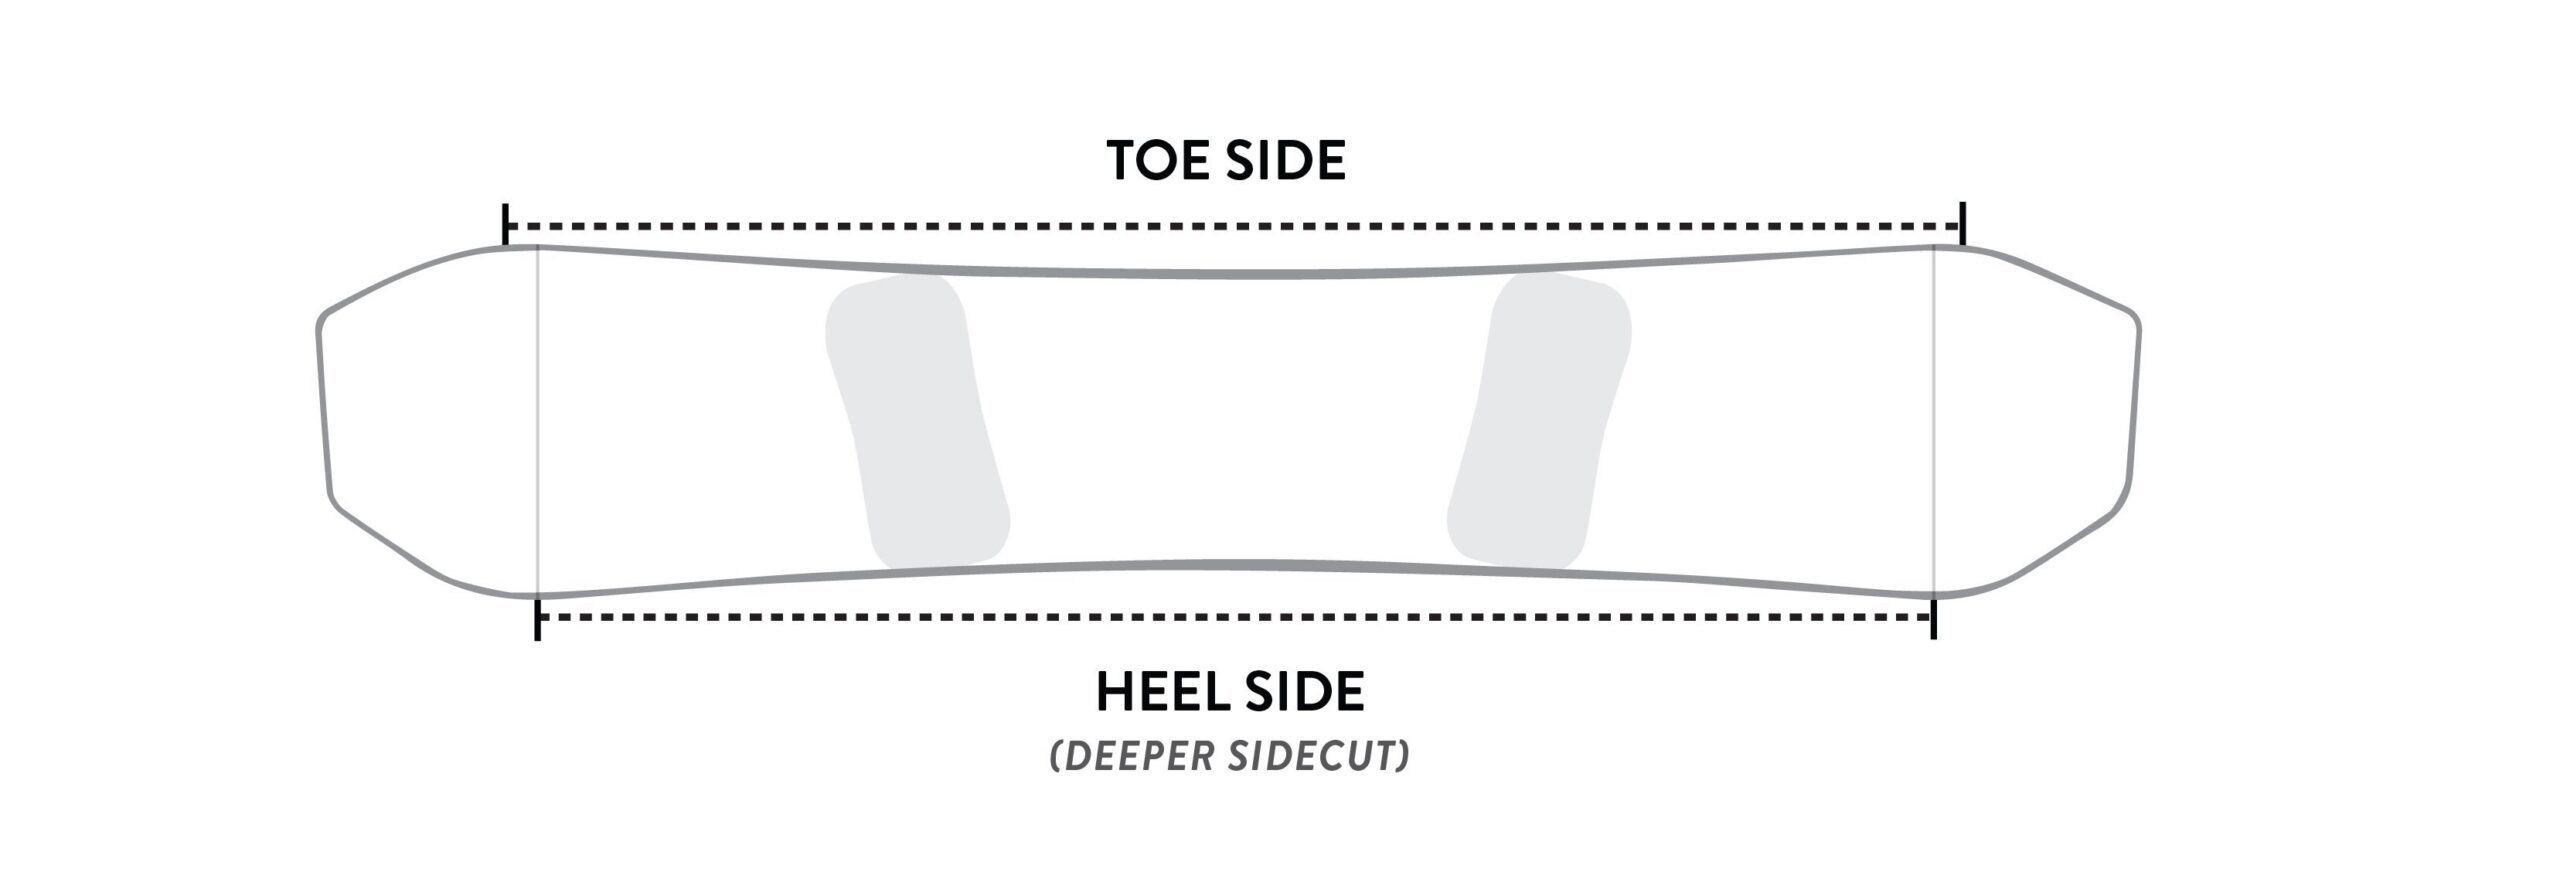
This is the measurement of how deep or shallow the board’s cut is from the nose of the board to its waist (or middle).
The sidecut radius helps the board turn. Thus, the smaller the sidecut radius, the tighter you will be able to turn. In contrast, a board with a larger sidecut will make big arching turns.
The radius of the circle is responsible for the hourglass shape of the Snowboard and, accordingly, how it is defined and measured. The sidecut radius works in conjunction with the running length of the Snowboard.
9. Tail
The tail is the rear end of the Snowboard, opposite of the nose or tip. Generally, the tail is flatter than the tip, with more squared cut.
Some alpine boards have a split in the tail for more turning power and coordination in high speed turns. Freestyle boards often have similar tips and noses to make it easier to ride fakie (with the front foot in the back).
10. Tail Length
This is the length of board from the widest part of the board’s tail to the tip of the tail.
11. Tail Width
The tail width is the widest part of the board that is measured across the tail’s tip or tail area of the board.
12. Top/Deck
Opposite of the base, the top of the board is where the bindings are mounted and the rider stands. Most Snowboards have mounting holes in the deck where the bindings can be screwed into.
These holes enable you to connect your bindings to your board in different angles and stances.

